Wardriving is the act of searching for Wi-Fi wireless networks, usually from a moving vehicle, using a laptop or smartphone. (…) Wardrivers use a Wi-Fi-equipped device together with a GPS device to record the location of wireless networks. – Wikipedia
I built an advanced wardriving system for Wi-Fi network logging dedicated for the 5 GHz radio band. It is based on Raspberry PI computer installed inside a car and multiple MikroTik devices with built-in dual-polarization antennas. Its purpose is to provide an additional source for network identification in my Wi-Fi DXing project.
The Raspberry PI computer runs Arch Linux ARM operating system with multiple instances of the MTscan software. The user interface is available via VNC on a mobile phone or laptop. Using the passive sniffer tool in MikroTik RouterOS software, each device performs TZSP streaming. All received packets are forwarded to the Raspberry PI, where beacons and probe responses are analysed.
New version (2021)
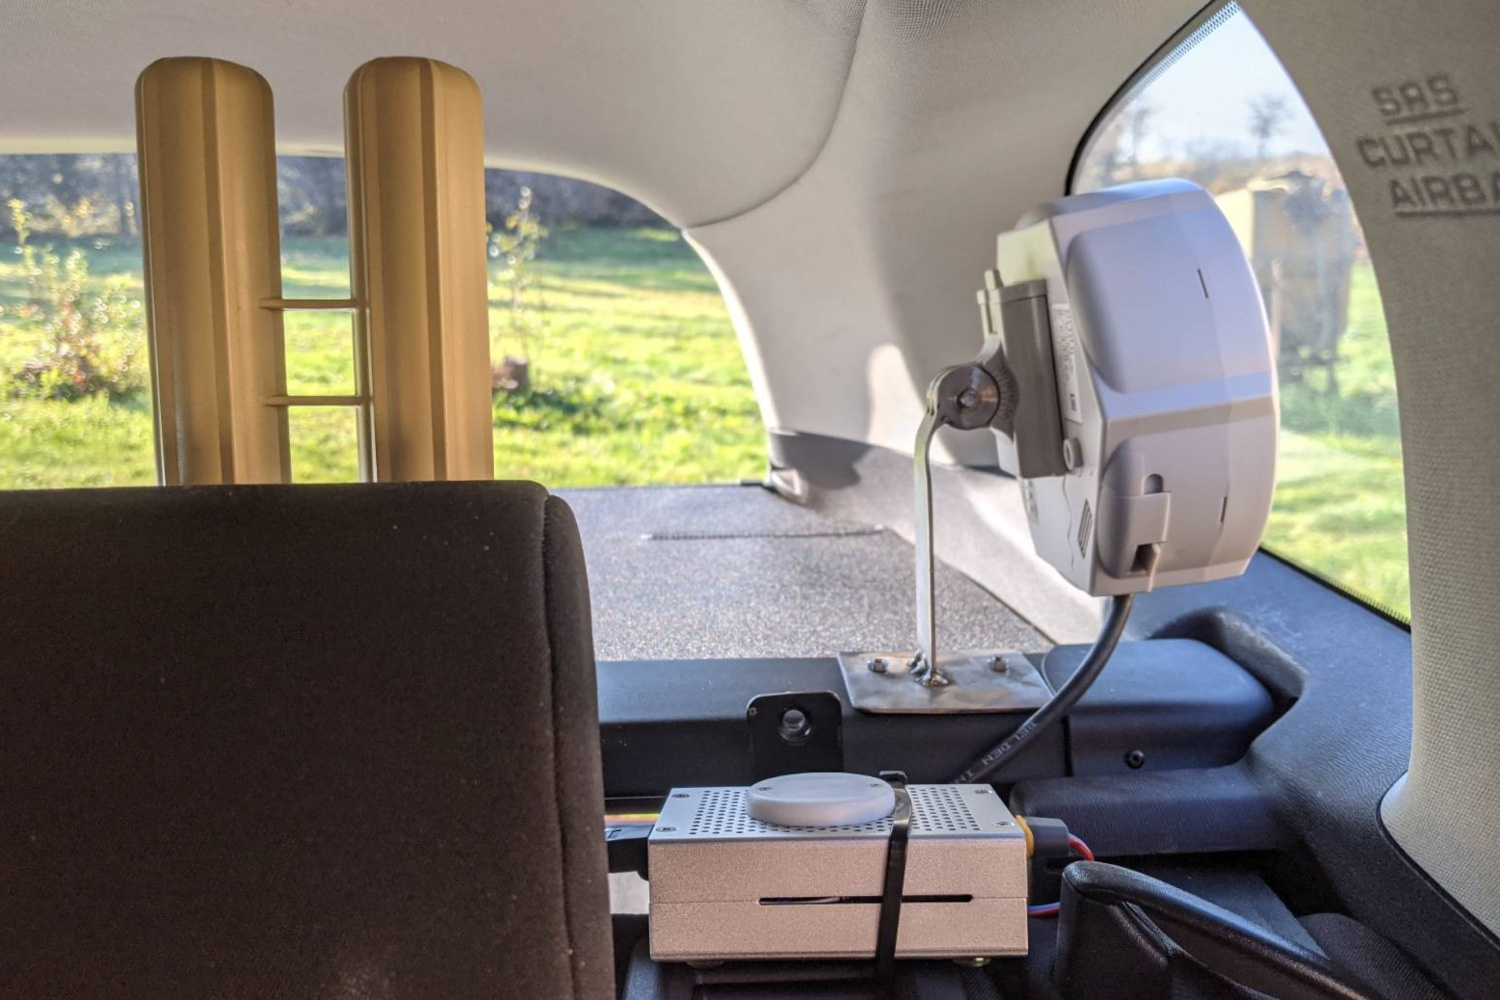
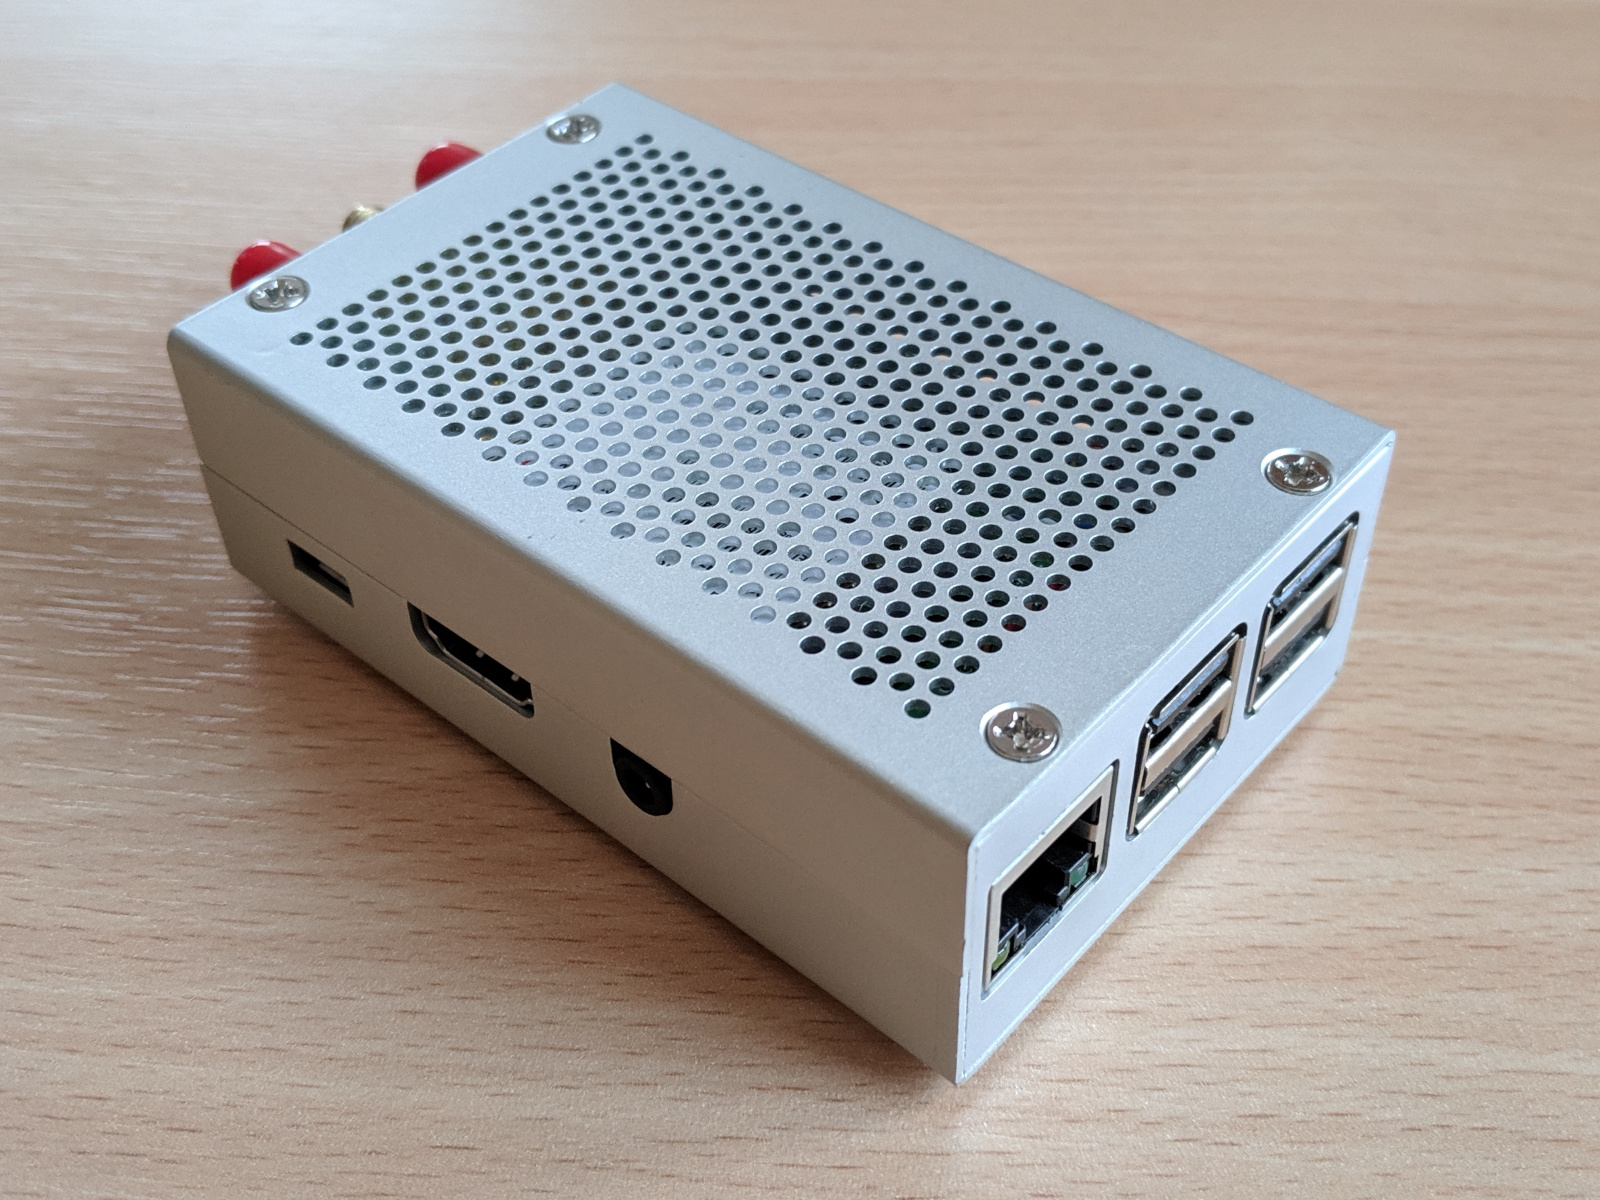
3 × OmniTik and 2 × SXT SA5 ac with a new Raspberry PI 3 B+ build is up and running!

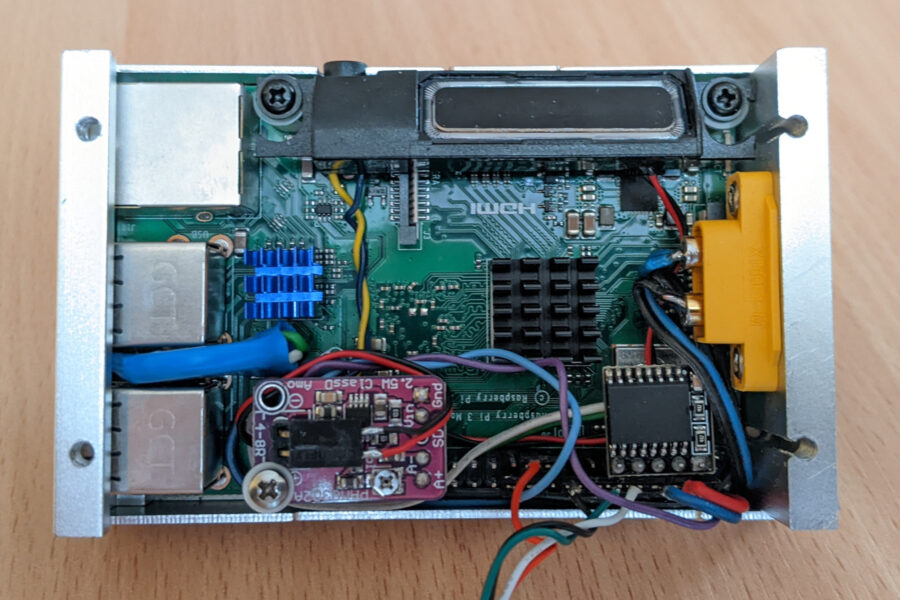
This build is based on Raspberry PI 3 B+ with…
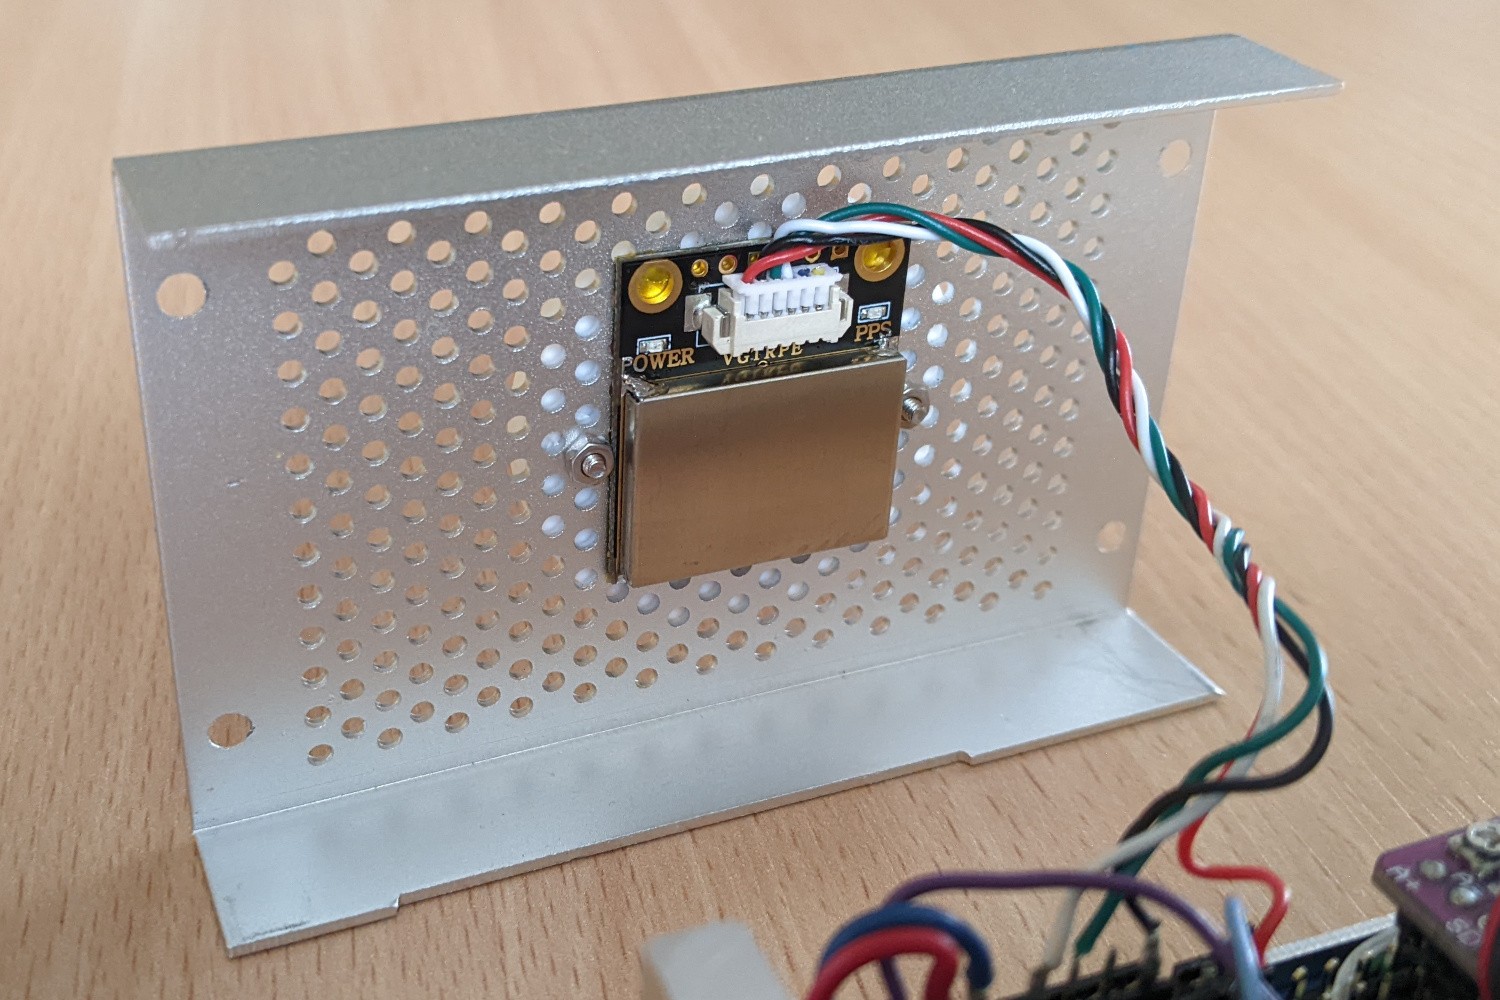
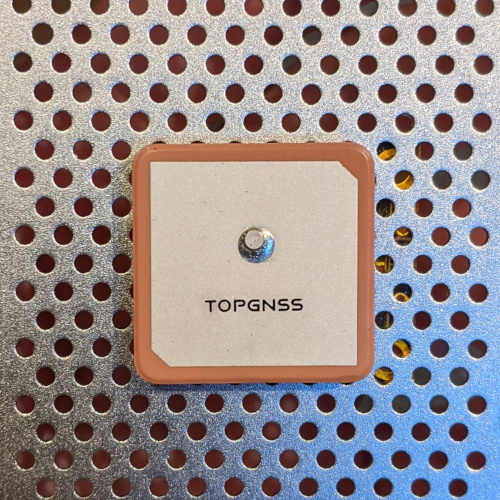
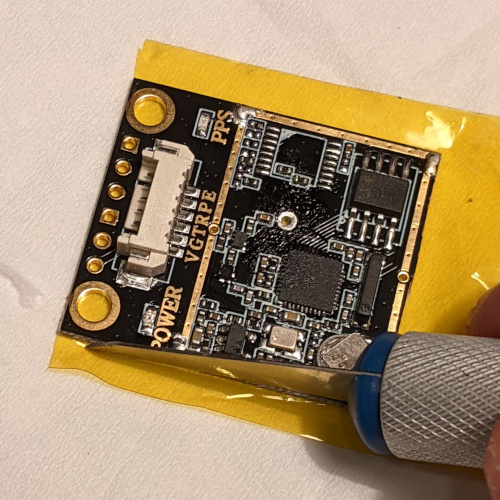
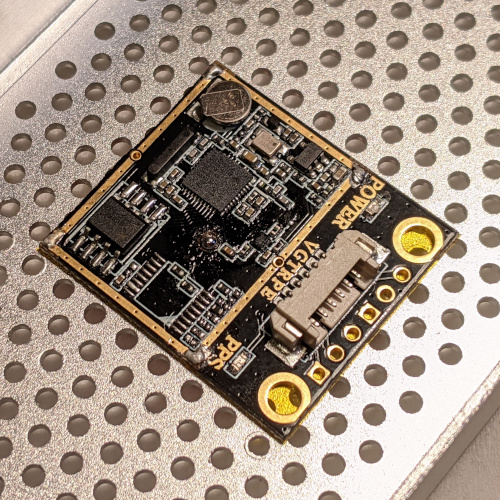
- uBlox M8 – GNSS module (UBX-M8030)
This is a very reliable GNSS receiver (GPS, Galileo, GLONASS and BeiDou). It is connected directly to Raspberry PI via UART (115200). It has configurable parameters, including update rate – up to 10 Hz. - DS3231 – real-time clock
DS3231SN is a great TXCO real-time clock IC, with 2 ppm accuracy specified within 0°C to +40°C temperature range. The long-term accuracy seems to be even better than specified. I soldered an external CR2032 battery which should last many years of continuous operation. - PAM8302 – audio power amplifier
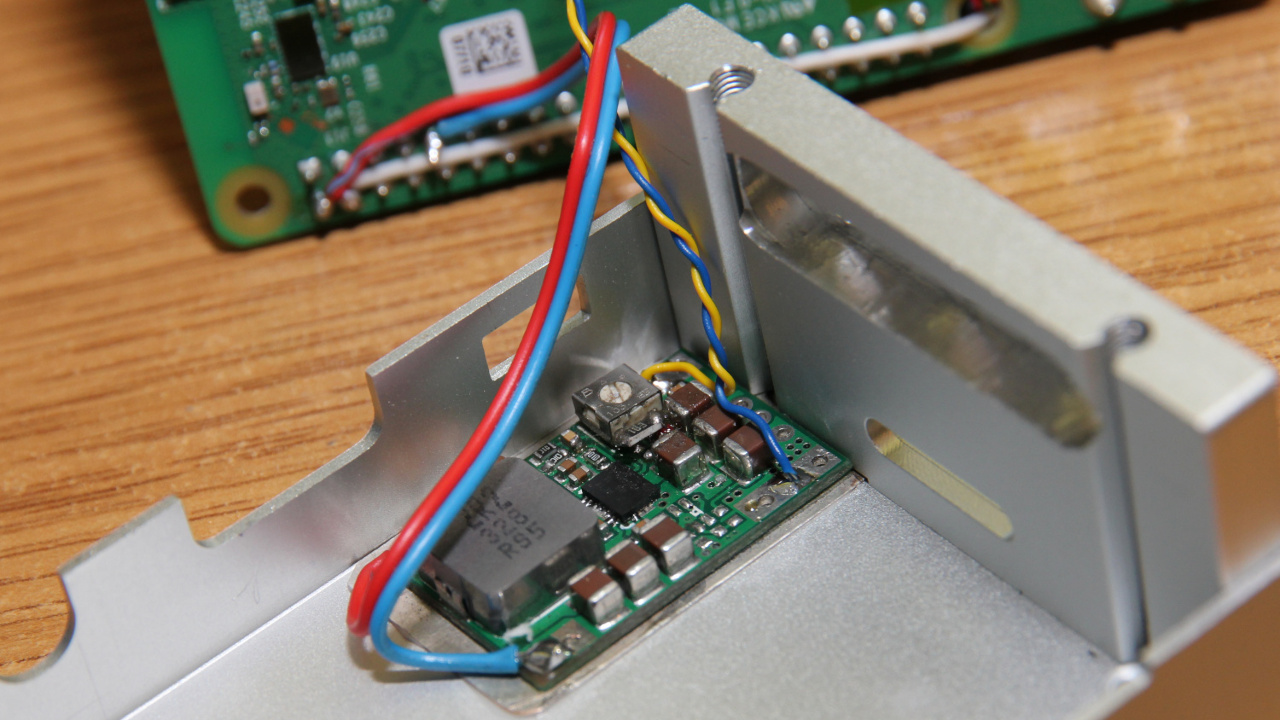
This is a nice and cheap mono audio power amplifier module. I bought a loudspeaker used in Dell E5470 laptop, which fits into the aluminium case together with other components and provides sound feedback (new network detection, no GNSS fix loss, connection problems, etc). - L5973D – step-down voltage converter (12 → 5 V)
The 12 V input is connected via XT60 socket and passed to L5973D module and to MikroTik devices via PoE header. The 5 V output is used as a power supply for Rasberry Pi 3 B+ board. This L5973D module can accept input voltage up to 20 V.
The ears of the middle OmniTik are gone – to make an unobstructed view through a rear window.
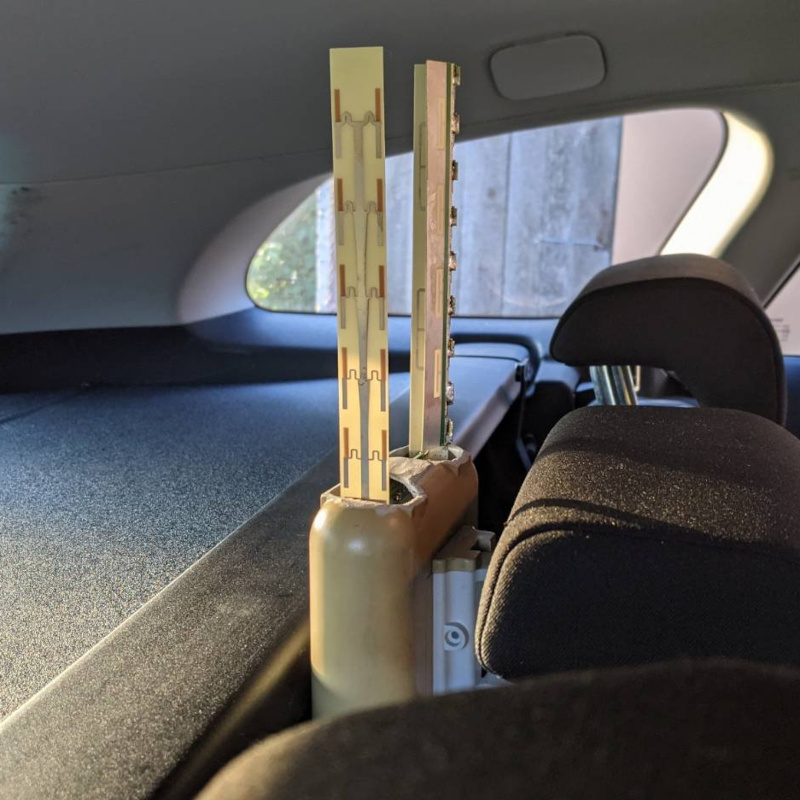
I unsoldered the GNSS antenna and I put it through the top of an aluminium case to solder it back again. It is covered and protected with a self-made Teflon cap, which is almost lossless.


First version (2018)
3 × OmniTik with Raspberry PI 3 B


This build was based on Raspberry PI 3 B with…
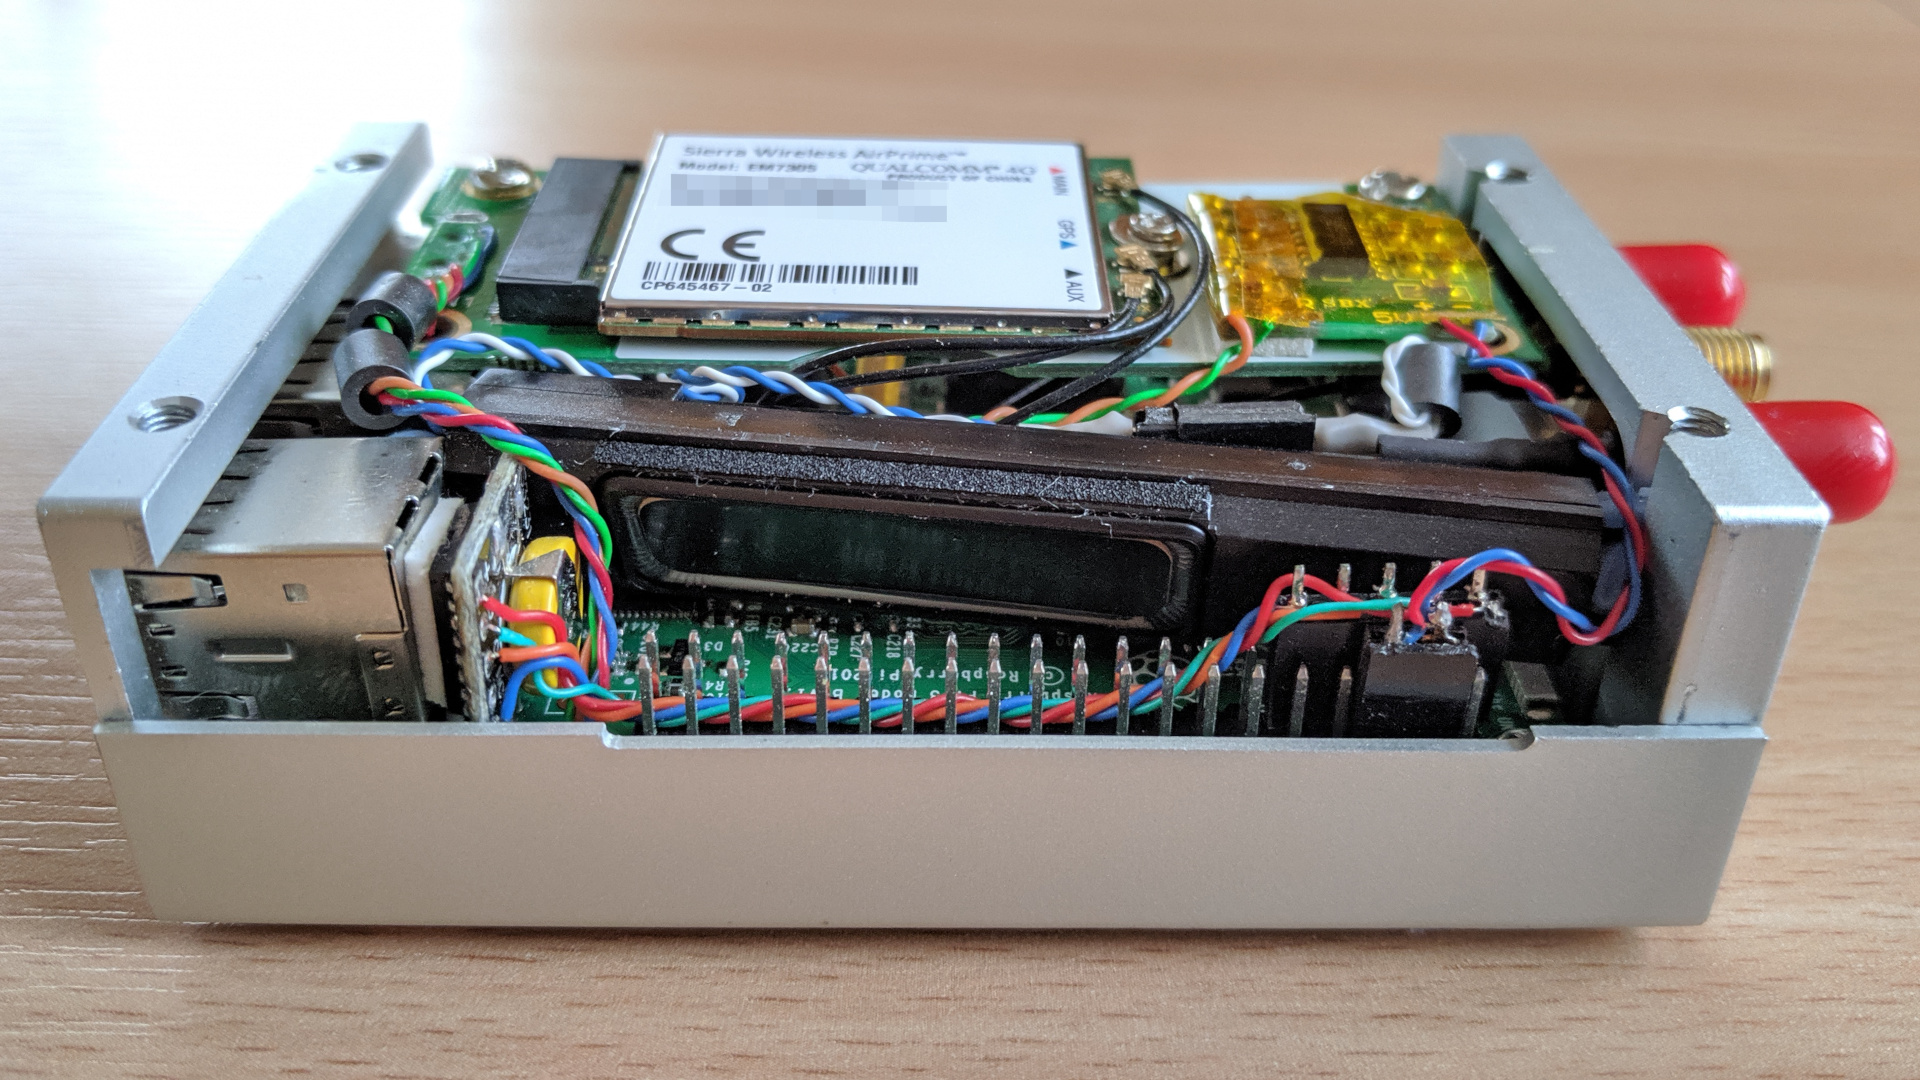
- Sierra Wireless EM7305 – LTE module with GNSS
I’ve been experimenting with some USB GNSS modules in the past, but their sensitivity and reliability was very questionable. In the meantime I found out that a LTE module in my laptop (MC7304) is a very reliable GNSS tracker. Therefore I decided to buy another Sierra Wireless module for Raspberry PI. The EM7305 module, which is actually the same as MC7304 (except it uses M.2 slot instead of miniPCIe), is widely available, because it was pre-installed in many laptops and can be obtained at bargain prices now. I bought mine for just $10. I also added three MHF4 → SMA pigtails for each antenna connector. Someday I might want to enable the LTE modem too.
These LTE modules are actually USB devices, so the M.2 to USB adapter provides direct connection to the USB bus. However, it requires a 3.3 V regulator, as the miniPCIe/M.2 port provides 3.3 V, not 5 V like the standard USB port. There is also a SIM card slot on the adapter’s bottom side. The adapter is much longer than M.2 card, but I managed to fit it inside the case. I also soldered a nut to the ethernet port and I screwed the adapter there (see photos below). Currently I don’t have any GNSS-dedicated passive SMA antenna, so I connected a random LTE rubber antenna (measured VSWR 3.5 @ 1575 MHz and 2.5 @ 1600 MHz). The GNSS module in EM7305 is very sensitive, so it works very well anyway. - TPS61088 – voltage converter
The TPS61088-based module is a very efficient step-up voltage converter. Raspberry PI requires 5 V DC power input, but such voltage is too low for powering external MikroTik devices. Therefore I added such converter to provide 10 V PoE output. In this way, the Raspberry PI can be also powered using a USB power bank, together with external PoE device. - PAM8403 – audio power amplifier
This is a very cheap stereo module for amplifying the audio output. I used only one output and I installed it together with an old loudspeaker from my Dell E7440 laptop. - DS3231 – real-time clock
RTC module is not necessary, as the GPS provides time synchronization. Though it is nice to have valid date and time at boot. The included battery has a quite low capacity. It lasted more than one year though.
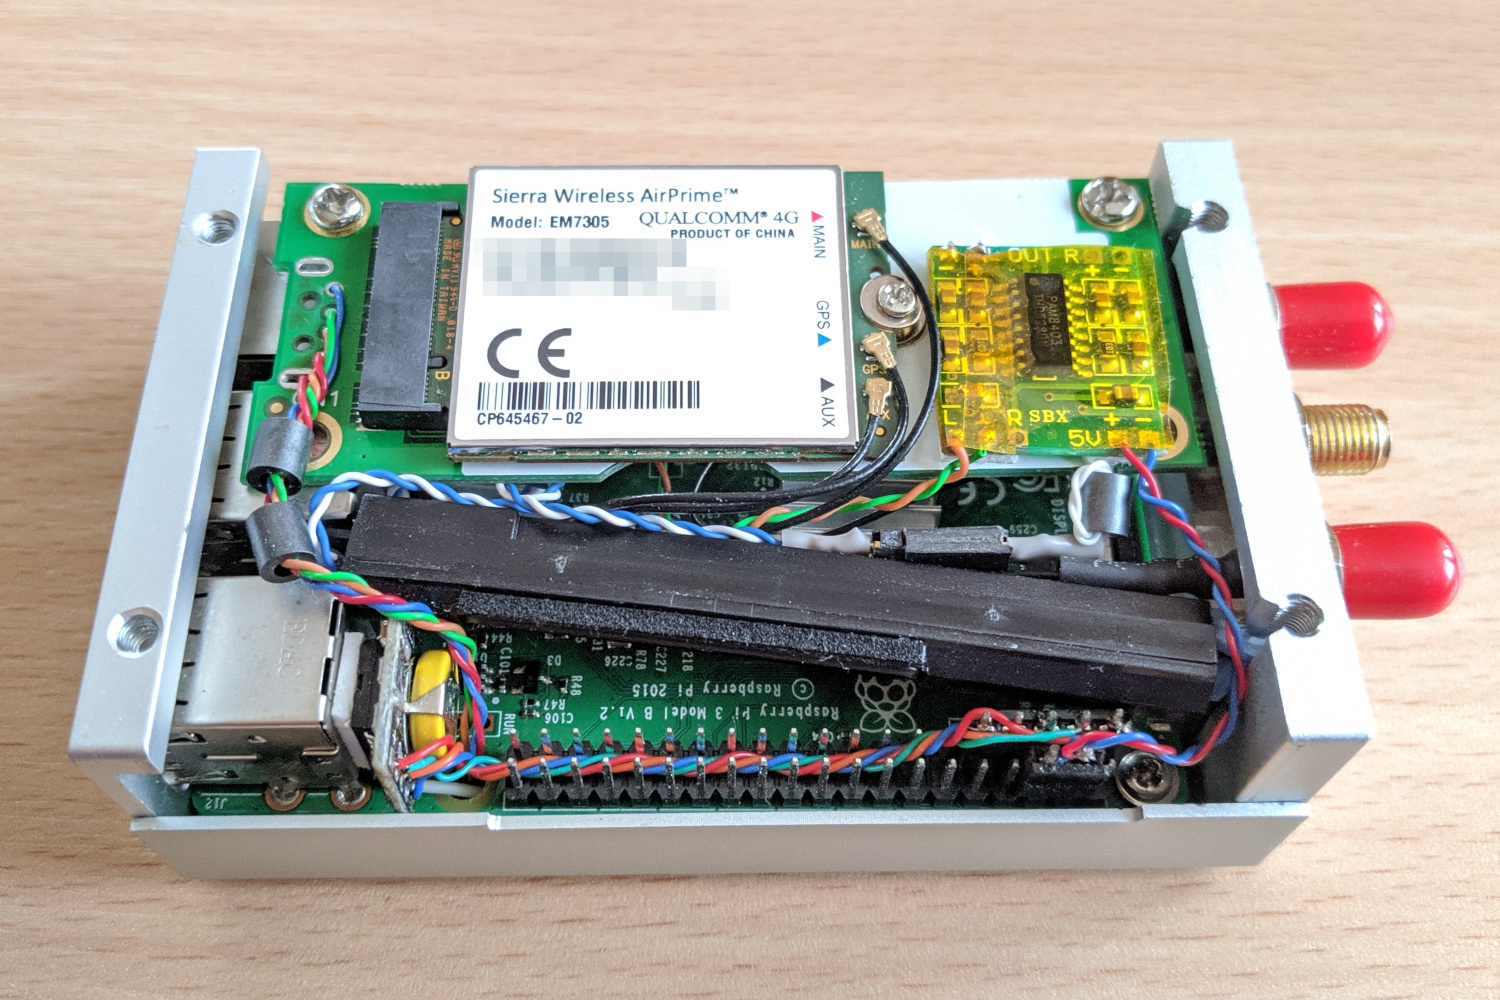
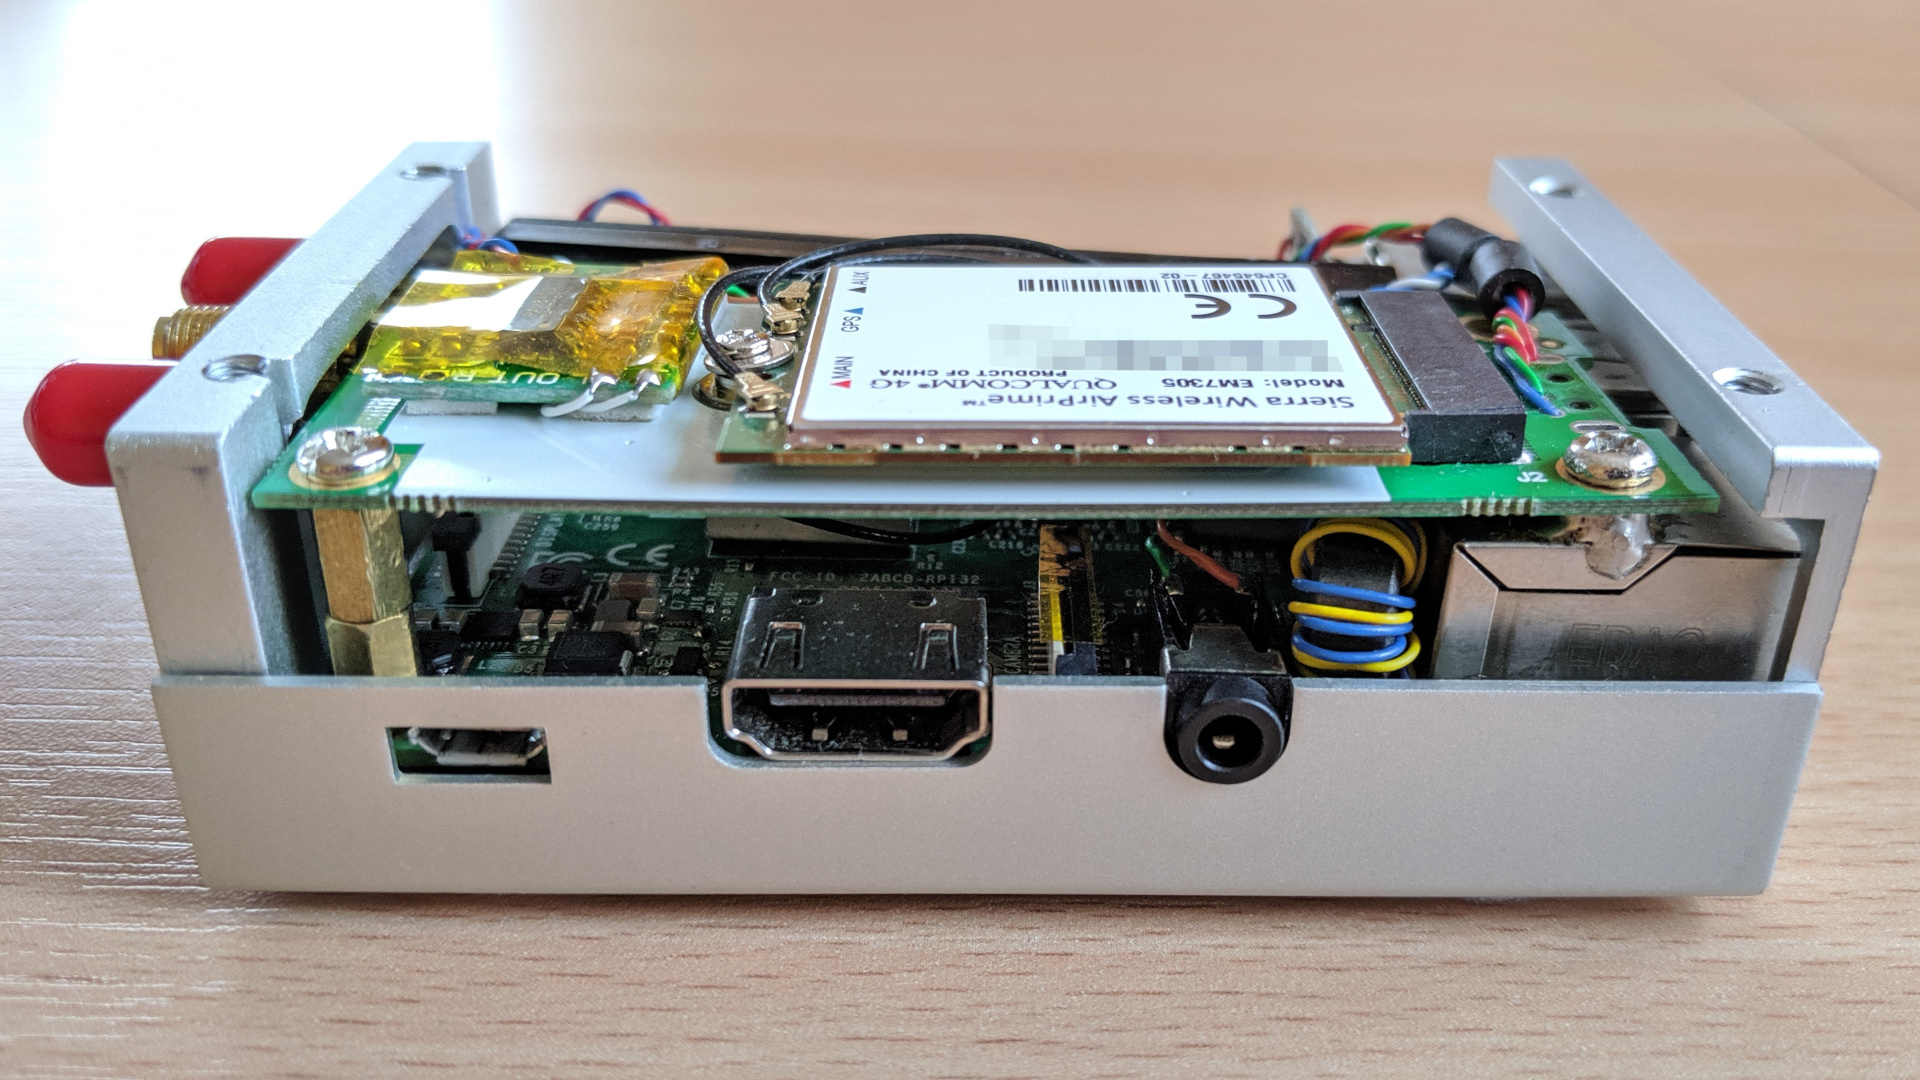
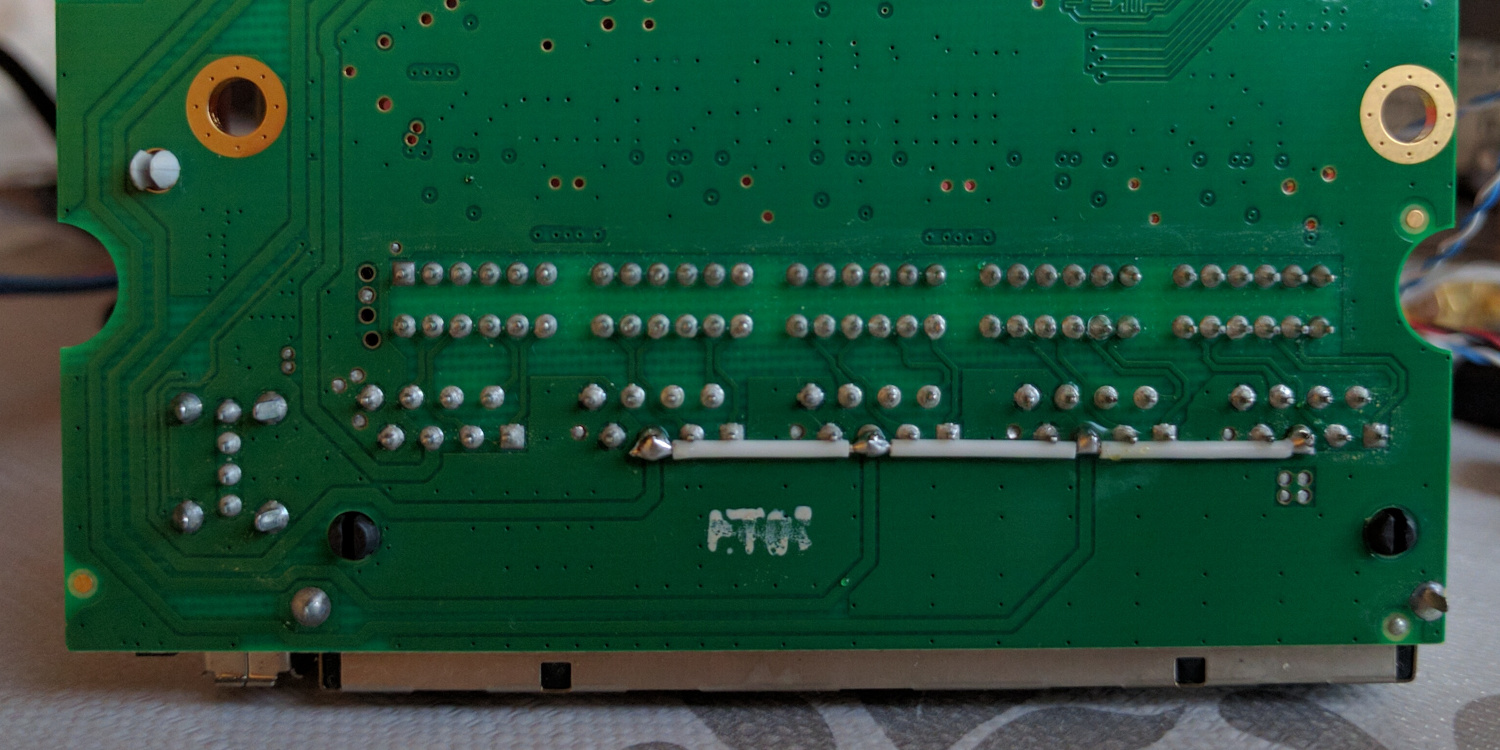
My Raspberry PI 3 model B, unlike the B+ version, does not offer a PoE header (Power over Ethernet) on the board. I didn’t want to spend another $40 for the B+ version, so I modified the Ethernet port on my own. Full disassembly, including desoldering is necessary. Inside port there is a small PCB board with a transformer in a plastic box. On the opposite PCB side there is also a quadruple 75Ω resistor. I cut it in half and soldered back, together with two wires for PoE supply, as can be seen in the pictures below.
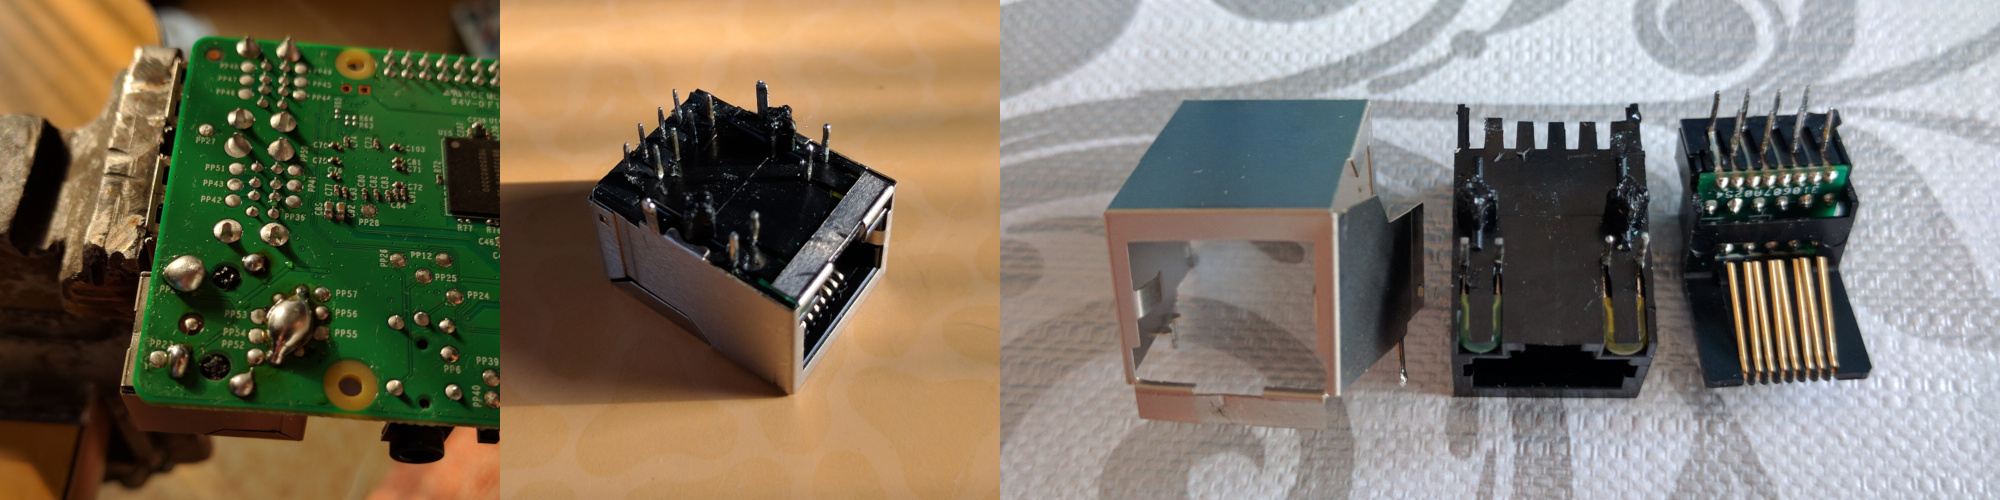
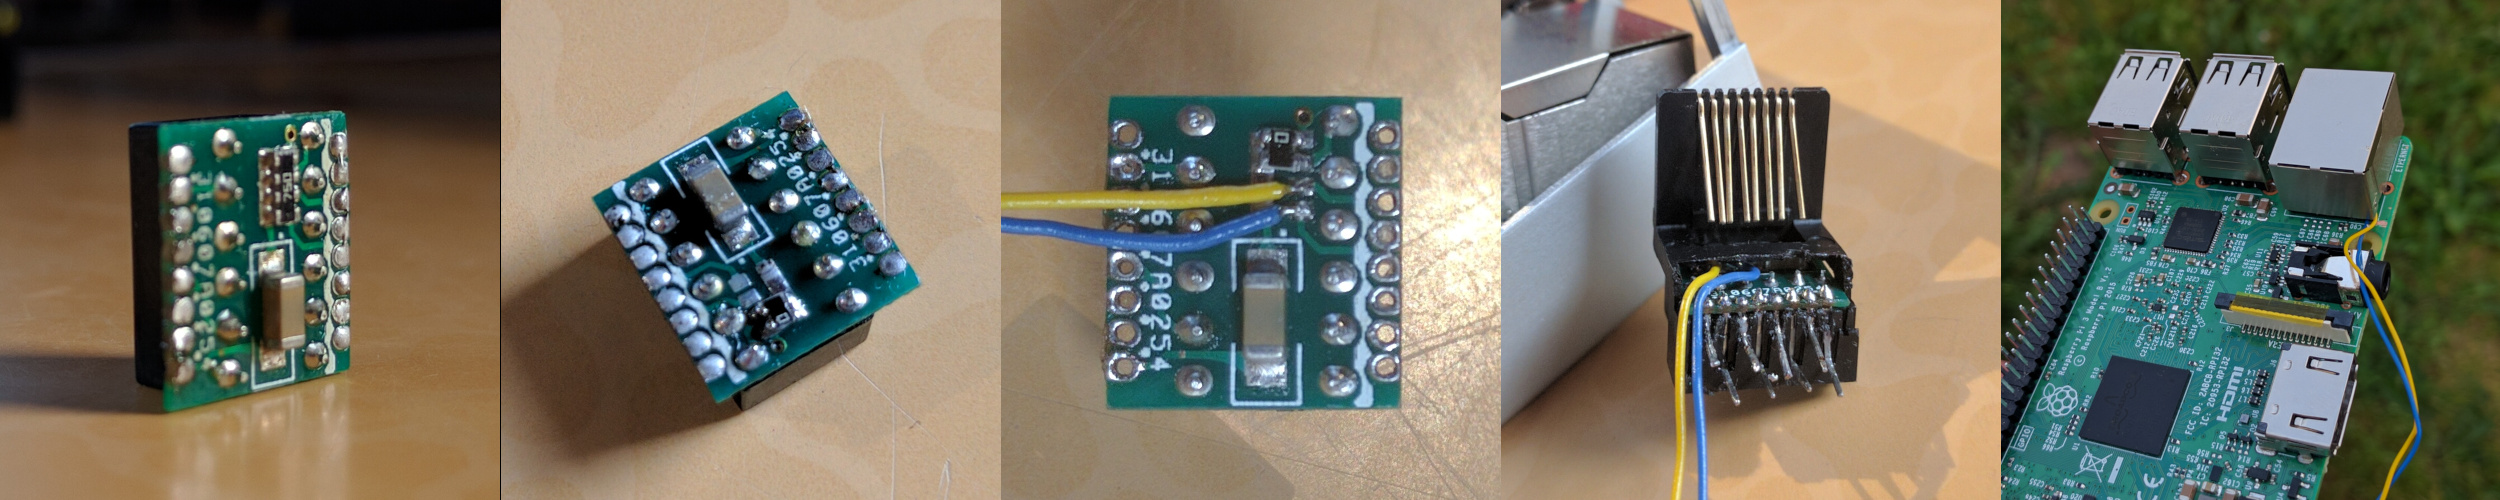
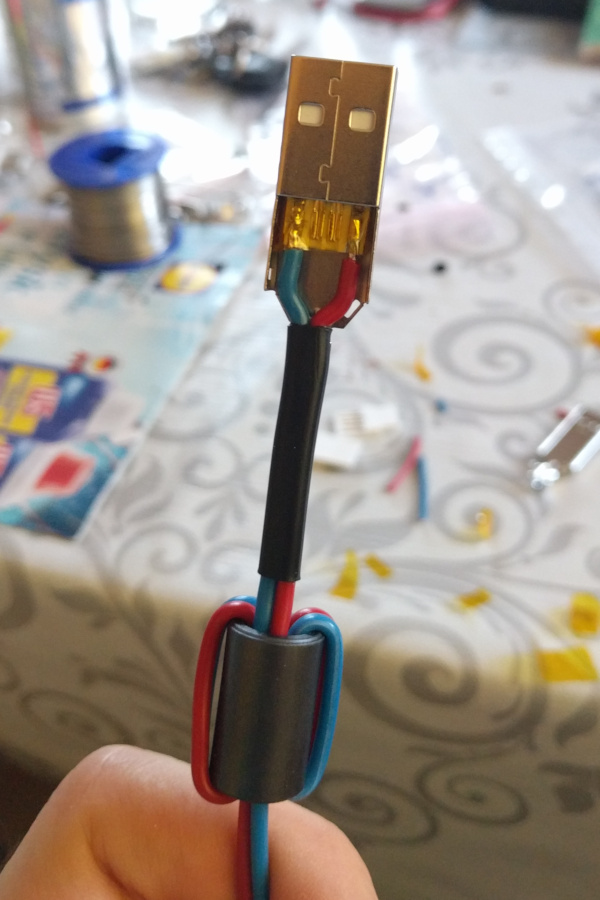
Similarly, I modified the USB port to provide 5 V input using full size connector, instead of small and unreliable microUSB port. Finally, I also added two small radiators for CPU and LAN/USB hub IC.
In order to avoid FM radio interference I added some ferrite chokes on the cables. Unfortunately, the OmniTIK boards inside the plastic cases are not shielded and there is some notable interference above 100 MHz on the FM radio band, even after switching the Ethernet link to 10 Mbps rate.


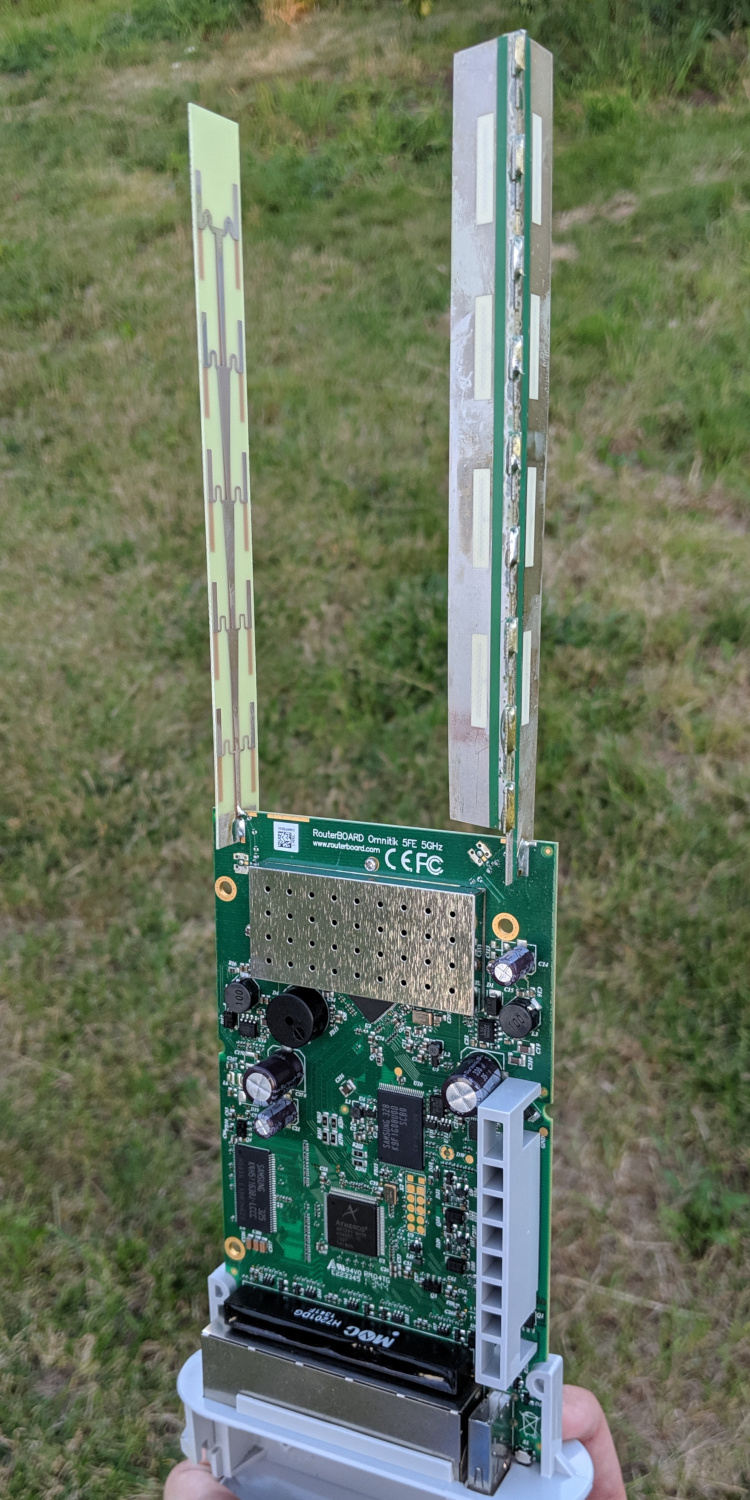
MikroTik OmniTIK 5HnD is an integrated access point device with built-in 5 GHz 2×2 MIMO Wi-Fi radio. There are two antennas for both vertical and horizontal polarization inside, which are soldered directly to the PCB without any additional RF losses. This device is capable of frequency tuning range from 4800 to 6100 MHz. I have the first version of this device with AR9280 radio IC, which is reliable for fast network scanning (i.e. channel hopping). The new version based on AR9344 is unreliable for wardriving setup, due to issues with channel calibration.
The Raspberry PI setup is connected to one of three OmniTIK antennas (the middle one). They feature 5-port Ethernet switch, so I connected other devices there. I’m using the U-5HnD model without PoE outputs, so I manually added the PoE injection across four of five available ports, as can be seen in the picture below.
Read more: